Too many grapes!
A few years ago, on a whim, I bought a few cheap grape plants. I was wandering through Lowes, as one does, and came across these little dormant grape sticks so I grabbed a few. They struggled in their original spot to take root and get growing, but finally in the fall of 2018 they were starting to get way too big for the original place I had put them.
The design
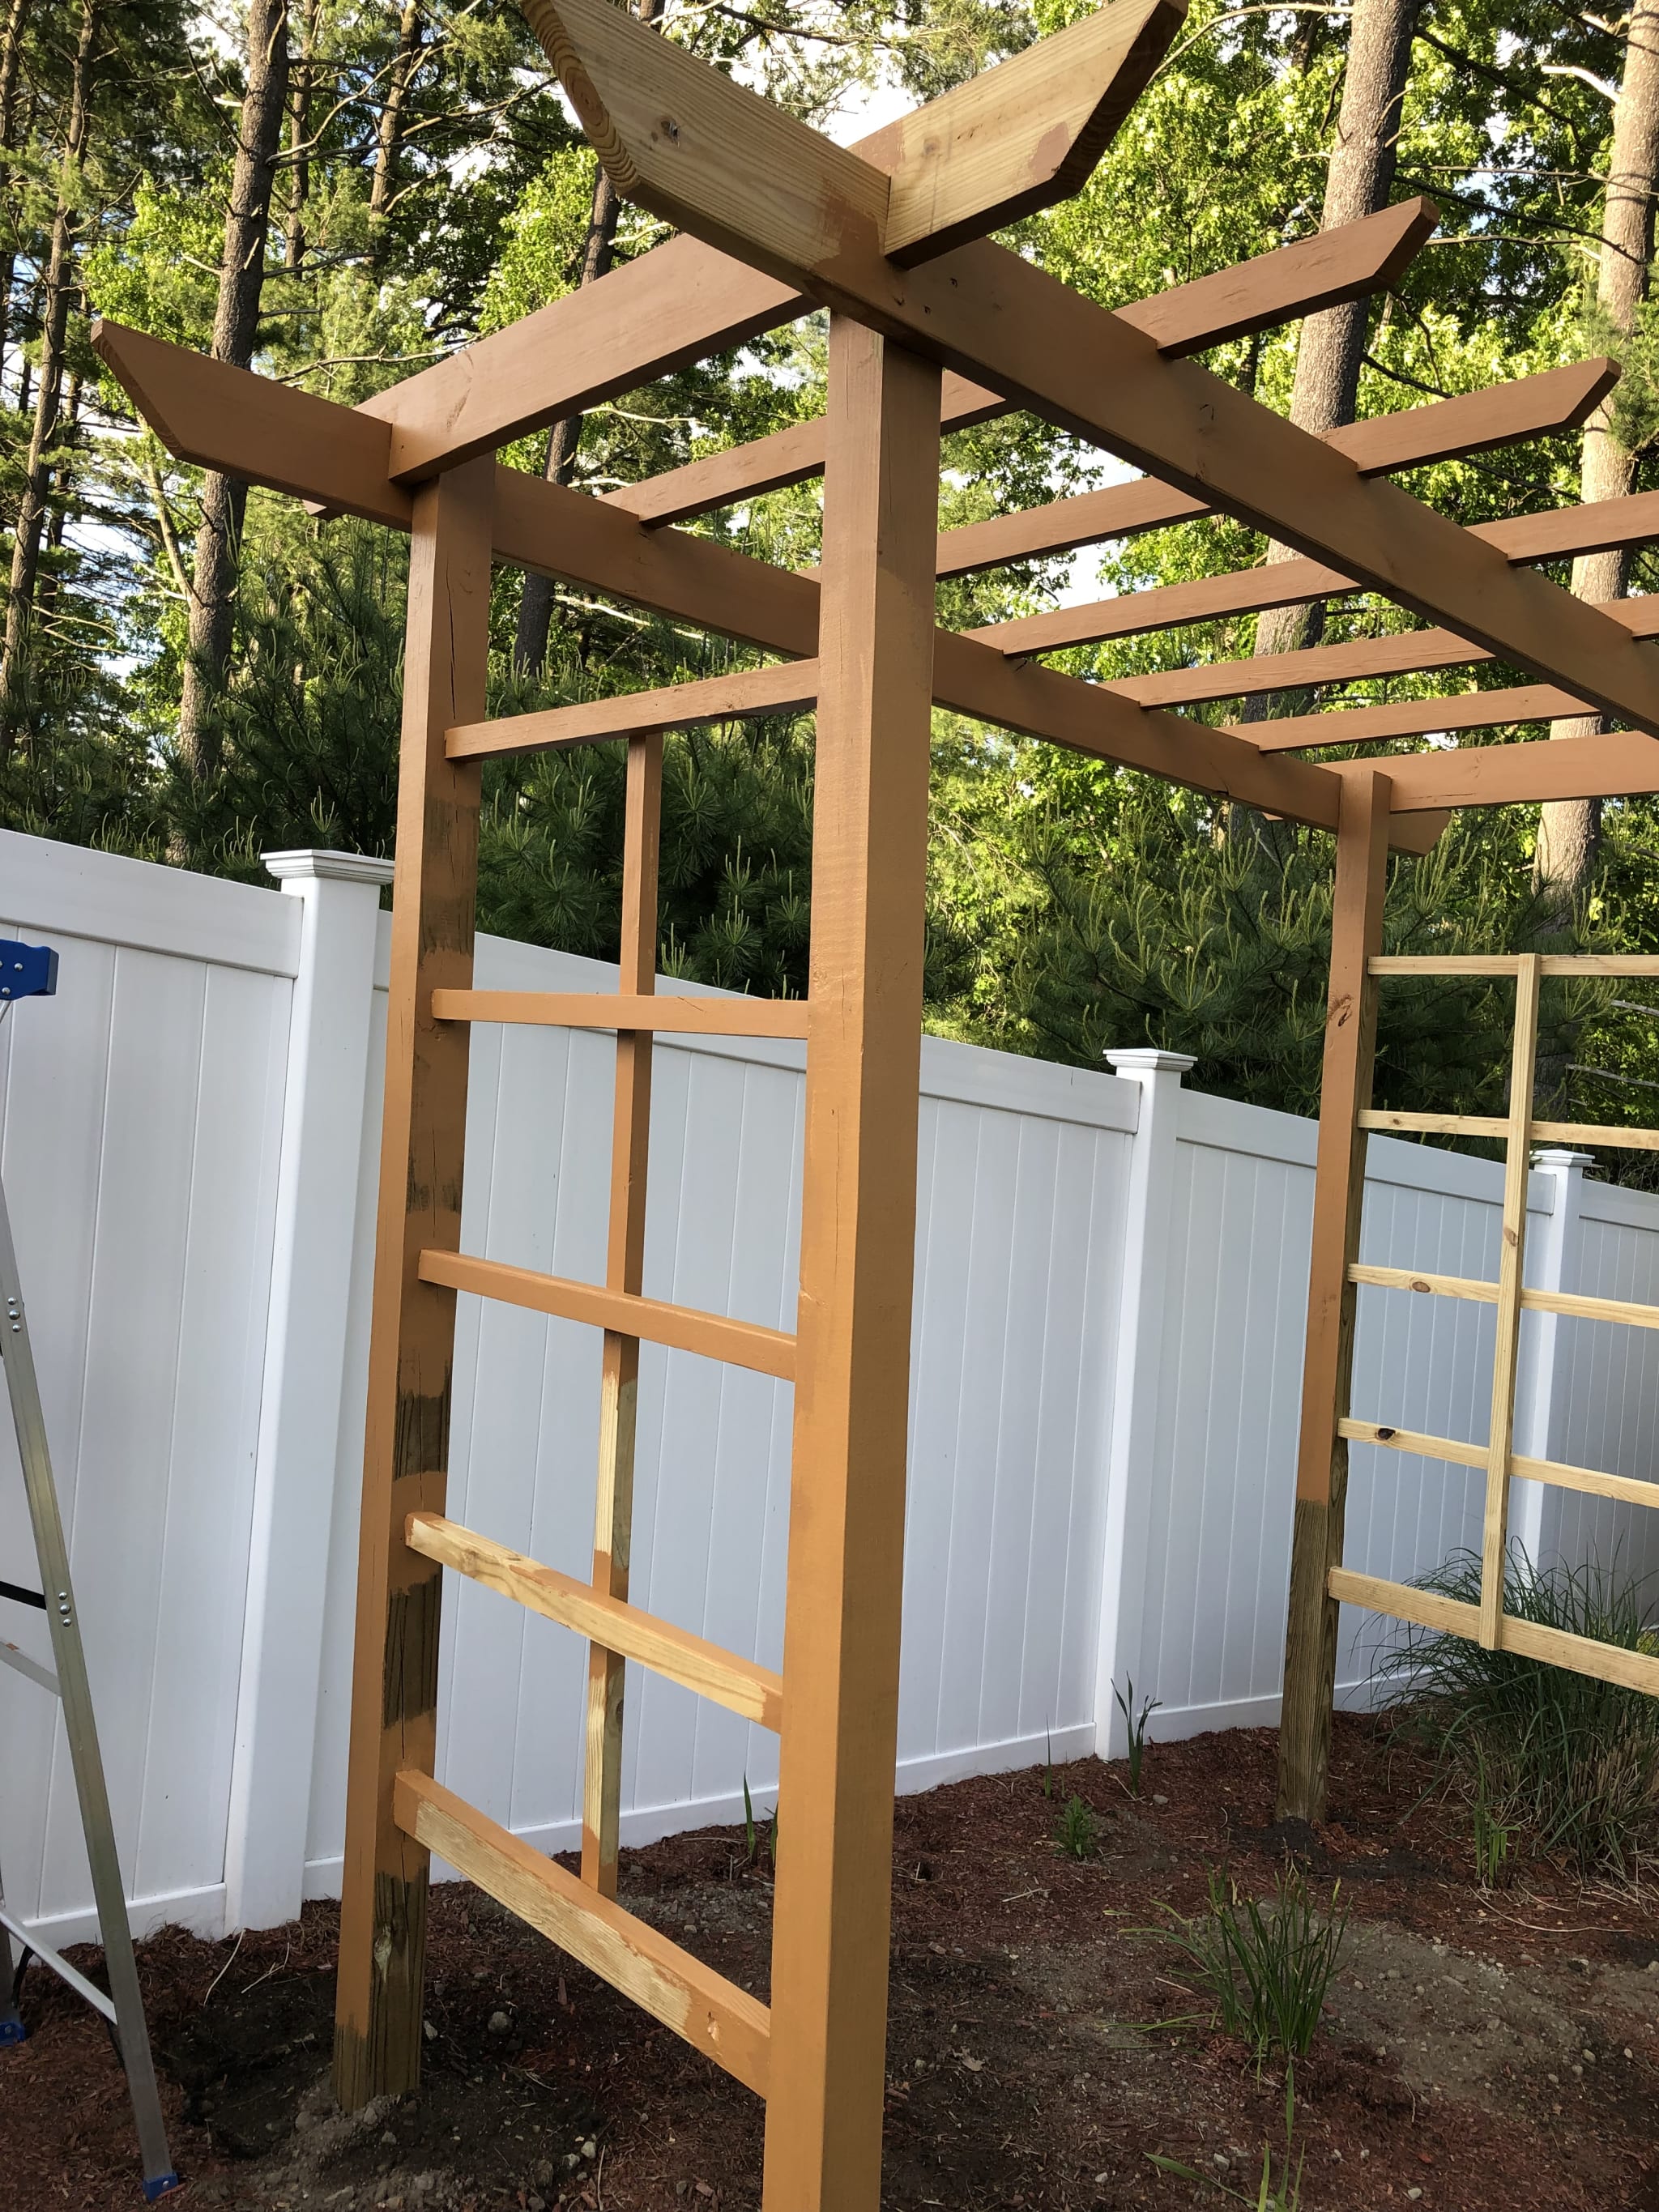
Natallia suggested I build us a larger structure for the grapes to grow on. We looked through a few different designs and plans online, and in the end found two we liked. I did my best to combine elements of each of them into our own unique design. Basically there would be a "ladder" on either side, with cross beams spanning the wide space between them.
First thing's first, I needed a whole bunch of pressure treated lumber. I chose 4x4s for the posts, 2x6s for the primary top beams, and used 2x4s for the rest of it. I'd also have to dig down pretty deep and set the 4x4s into a concrete footing so this thing wouldn't come crashing down.

The build
I started with the easiest part. I knew how much horizontal space I wanted this structure to take up, so I started by cutting the long horizontal cross beams. I decided to cut the bottom corner off each end to make it look more interesting than just a big long 2x6 board.

Next I ripped some of the 2x4s in half for the rungs of the side "ladders". I planned to use mortise-and-tenon joints for joining the posts to the rungs, but that's five rungs on each ladder, which adds up to 10 rungs and 20 mortise-and-tenon joints. I decided to use my router to speed up cutting the tenons.


I spread the rungs out spacing things so I had enough 4x4 post to put in the concrete footing underground, and enough space on top for the cross beams to attach. After marking the spots I needed to mortise, I took out my drill with a forstner bit and drilled 20 holes. I had to switch batteries partway through. Unfortunately, the marking and drilling was the easy part. Since every tenon is a rectangle, I need to chop each mortise to the correct dimensions with my chisels. This took time and patience. If you try to go too fast you can mess up your piece or dull your chisel.


It took a few adjustments for each, but after some test fitting and cleanup everything came together.


After I test fit, it was time to glue and clamp. Except I don't own clamps large enough for this and I didn't feel like going to the store to look for some. I tried tying it all together and it worked out less than ideal, but well enough.

With Natallia's help, I was able to move the ladders to the garden bed where they would be set up without damaging them. Next step: digging holes. This part was a pain. Our property was previously a pine forest on top of glacial till. This means we have a thin layer of topsoil and loamy soil followed by a dense almost sandy soil riddled with stones of all kinds of sizes from my thumb to larger than my head. I used a shovel, a pickaxe, and a 14-lb steel rod to dig and pry the holes to the depth I wanted. I got my quick-set concrete ready, and again with Natallia's help stood up the ladders to vertical and added the concrete.

After the concrete fully set up, I climbed up my ladder and attached the long cross beams, and the shorter ones that would stabilize the whole top. When I layed out the top rungs I noticed that they looked ugly since they were just squared edges. I hadn't planned to, but I was going to have to miter those corners or else they would bug me. Unfortunately I realized this later at night and I didn't want to fire up the loud saw at that point so it was all hand-sawing work.


At this point I realized that the 2x4 top middle rungs would sit higher than the 2x6 side rungs. This would also drive me crazy to look at so I would have to cut a little notch out of each rung to lower it by the appropriate amount to be the same top-height as the side rungs. Some quick saw and chisel work was in order.

Finally I was able to screw and glue everything in to place and paint it with a nice toasty tan solid stain.

Transplanting
We're not done yet! I might have a nice structure going on, but there is nothing to grow on it. Time to move the rather well established grapes from our garden boxes across the yard and plant them in their new home. The roots were so well established I had to take the garden boxes apart to remove the plants with minimal damage.


After a few weeks of checking on the grapes every day and making sure they were growing, I am happy to report they took well to their new home.

Mistakes
Let's talk about what didn't go well.
Planning
This might be a positive or maybe a negative. I didn't fully plan out the top, so I had to do some last minute mitering at night by hand. Amazingly it went ok, but still if I had planned ahead maybe it would have been a little easier.
Secondly, I wish I had large clamps when I was building those side ladders, it would have made the glue up a lot easier.
I also dropped a bag of cement and it split open and spilled all over the place. Ugh.
All in all though, it went well and I am pretty happy with it!